3/5/10

Moving blogs..

Hi friends and family.
Thanks for checking out my blog! It is such a fun addiction (to my husband's dismay) to find and craft great ideas. Loving it. Just wanted to let you know that I have actually teamed up with my sister, Lindsay, and made a joint blog for us to virtual-craft together. I won't be posting on bellebrilliance anymore.. the new blog is called ellemichelleandelizabelle.blogspot.com. I know it's long, but blog names are running short - and at least it rhymes!
Enjoy if you please :)

3/3/10

Oven Mitt Makeover

Last week I was in the check-out line at IKEA and I spotted these plain, white oven mitts and I thought, "I can spice those up a bit." So I bought one, and this is what I did with it:
Here's how I did it:
First, I sewed on a length of fabric about an inch and a half wide around the base of the mitt.
I stitched around the top and bottom of the strip.
Next, I ironed on some stitch witchery to red fabric and traced and cut my whimsical bird outline (backwards from the way I wanted it to face on the mitt).
Then, I ironed it onto my oven mitt, and hand stitched around the perimeter.
I added some buttons -- and it's finished :)

3/1/10

Charming Cupcake

I'm signed up for a cake decorating class starting this Thursday throughout the month of March. I am so excited! It was a Christmas present from my sweet husband. Can't wait to make these little cuties:
Tall Blossoms by Bev (Sugarbloom Cupcakes).
image via flikr
p.s. I am SOOOO HAPPY March is here! Blossoms, warm weather, play dates at the park!

2/26/10

Color Inspiration

I am loving on the colors seafoam green and red together. I have a big red wall in my living room and I've decided to make the accent color seafoam green. Hence, the birdie I made earlier.

2/24/10

Spiced-Up Tea Towels

I love the ideas from Ashley's makeitandloveit blog. She posted about dressing up plain-old tea towels to match your kitchen. I made these for my good friend Kim's bridal shower. Her kitchen will be red, tan and black.

Here's how to:
Cut a 2 1/2 inch strip of fabric - measure the width of your tea towel and cut length of fabric 1 inch longer (length-wise)
Iron your fabric edges over 1/4 inch around entire perimeter.
Place on tea towel and fold 2 edges around the back side of tea towel.
Stitch 1/4 inch seam around entire strip.
Embellish with buttons, yo-yos's, applique, et.
(Yep, there's that fabric yo-yo showing up again. :)

2/23/10

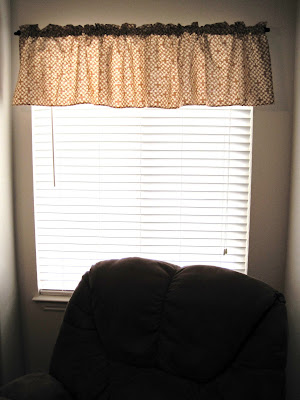
Nursery Makeover Part 2: Orange Curtain

My sweet mom made a cute valence curtain that I followed the basic pattern of to make this orange curtain.
Here's how to if you want to try it yourself:
Cut out 2 equal lengths of fabric. Mine each measured 22" x 50" (you could make it shorter if you like, it will just affect how 'bunchy' the valence is)
Place both pieces right side together and sew 1/2 inch seam along width edge to make one long piece of fabric. (Once put together, mine measured roughly 22" by 99")
Iron open the seam you just made. Then, stitch a 1/4 or 1/2 inch seam around entire piece of fabric.
Fold over one length of the fabric 3 1/2 inches. Stitch along the bottom of this fold. THen, Stitch another seam 2 inches closer to the folded edge. This gives you a space to put your curtain rod through.
Quick and easy way to add a splash of color.

2/22/10

Cute in just a white onsie.

Baby shower present, anyone? These are so simple to make and are so darling. I know you can find these onsies everywhere on etsy, boutiques, etc., but here's how I made them.

This first one doesn't even require a sewing machine and I think it's my favorite. (Sorry these first two pictures look a little pink - they are in fact white onesies).
So, I found this tutorial for fabric yo-yo's here. It is a great tutorial and makes more sense than I could by trying to explain it. Check it out if you want to try them out. (I now embellish all sorts of things with these yo yo's: headbands, brooches, cards, cork boards, et.)

For this project, I made a yo-yo, then just stitched a button in the middle of it to hold it in place. So simple!
This one is just 2 misshapen squares stitched on top of each other.
The elephant. Honestly, to make these animals, I just googled images of 'elephants' 'frogs' girraffe' etc. I printed them out, then cut out the silhouette, traced it onto the wrong side of the fabric (with applique ironed on). Then, I cut out my traced image, ironed it onto the onsie and simply stitched around the edge. I did just a straight stitch, not zig-zag because I kind of like the frayed/homemade look once it's washed.
I don't know what this is.. apple? flower? any other guesses? It turned out cute anyhow.
Flower.

Labels